Showing posts with label cream cheese. Show all posts

Wednesday, 18 July 2012

Mushroom and Spinach Ravioli with Chive Butter Sauce


This was my first time ever making pasta from scratch! As a result, I see a pasta roller in my future (hint hint to the hubs - and, BONUS, I have lots of those 20% off coupons too!)

These little raviolis were so good, but they were sooooo labor intensive! Rolling out pasta dough is a workout! I think I worked off enough calories to eat two servings!! Which is a good thing, because I'm pretty sure I ate at least 2 servings!


It's so cute!

 The Chive Butter Sauce was good, but these little guys can stand alone.  The one thing I wouldn't do is put a red sauce on them. I think that would take away from the delicious flavors combined in the filling.

Ingredients
  • 1 teaspoon olive oil
  • 1 1/2 teaspoons water (or more as needed)
  • 2 eggs
  • 2 cups all-purpose flour (or more as needed)
  • 1/4 teaspoon salt
  • 1 teaspoon olive oil
  • 1 clove garlic, minced
  • 1/2 chopped onion
  • 1 (8 ounce) package fresh mushrooms, chopped
  • 4 ounces cream cheese softened
  • 1/3 cup grated Parmesan Cheese
  • 1/2 cup Mozzarella Cheese
  • 1/2 cup frozen spinach, thawed and drained
  • 1 tablespoon chopped fresh chives
  • 1 tablespoon fresh parsley
  • 1/2 teaspoon ground cayenne pepper
  • salt and pepper to taste
  • 1 egg white beaten
  • 3 tablespoons unsalted butter
  • 1 1/2 teaspoons chopped fresh chives

Directions
  1. Whisk together 1 teaspoon olive oil, 1 1/2 teaspoons water, and 2 eggs until combined; set aside. In a separate large bowl, combine flour and salt and make a well in the center. Pour the egg mixture into the well and stir until just combined. Turn dough out onto a lightly floured surface and knead until smooth, adding more flour or water as needed. This should take about 5-10 minutes. Wrap dough tightly with plastic rest and set aside.
  2. Heat 1 teaspoon olive oil in a skillet over medium heat. Add 1/2 cup chopped onion and 1 clove minced garlic and stir until onion softens. Add 8 ounces of fresh chopped mushrooms and continue cooking and stirring until the veggies are soft and the liquid has evaporated, about 10 minutes. Remove from heat and set aside to cool.
  3. Beat 4 ounces of cream cheese in a bowl until smooth, stir in the cooled veggie mixture, 1/3 cup Parmesan Cheese, 1/2 cup Mozzarella Cheese, 1/2 cup spinach, 1 tablespoon chopped fresh chives, 1 tablespoon fresh parsley, and 1/2 teaspoon of ground cayenne pepper. Mix to combine and season with salt and pepper to taste.\
  4. Roll the pasta dough out very thin, about 1/16". Using a large 3-4" cookie cutter or tart cutter cut circles out of the dough. Roll each circle out as thin as possible. Working with one circle at a time, brush the pasta lightly with the beaten egg white and top with 1 heaping tablespoon full of the filling right onto the center of the pasta. Top with another piece of pasta and pinch edges to seal. Use your cookie cutter or tart mold to cut the pasta once more to form a uniform shape. Reserve the finished ravioli on a floured baking sheet and repeat with the remaining pasta and filling.
  5. Fill a large pot about 2/3 full with water and bring to a boil. Salt the water using about 1/2 to 1 tablespoon of sea salt. Once the water is boiling, stir in the ravioli and return to a boil. Cook about 3-4 minutes or until the pasta floats to the top. Drain.
  6. Begin making the sauce while you are waiting for the water to boil, but keep and eye on it! Melt 3 tablespoons butter in a skillet over mid-high heat, cooking and stirring until browned (about 5-7 minutes). Stir in 1 1/2 teaspoons chives and serve over hot ravioli. Enjoy!

Monday, 28 May 2012

Breakfast for Dinner? Yes, please!


This isn't just for dinner, of course, but it does work in a pinch! One day last week, I had not been to the grocery so the cupboards were bare!  After having a very busy day, all I really wanted to do was relax. I certainly didn't want to leave the house and go to a restaurant for dinner! So, what to do?  Make breakfast, of course!  

Don LOVES a good breakfast with eggs, potatoes, bacon, and toast, so I knew he wouldn't be disappointed!  I always start the potatoes first, as they take a little time to get soft the way the hubs likes 'em.  I gathered what I needed...

Eggs, potatoes, onions, garlic, bacon, cream cheese, salt, and pepper
and got to work!  I always like to have everything right on hand - especially when making something like this that moves along quickly.  First I cubed the potatoes. I used Yukon Gold potatoes - they are my absolute favorite potato! ...and what I happened to have on hand. I recommend cubing 1.5 to 2 potatoes per person.  For some reason I used 3 here - I guess I thought the hubs was going to be extra hungry!

Then I diced up 1/2 of an onion - that looked good for the amount of potatoes I was making. I also minced up 2 garlic cloves - I LOVE garlic! I heated a skillet on medium-high heat and placed a thick slice of bacon in the pan to render the fat.  


Once my bacon was cooked on both sides, and I had a good amount of fat in the pan, I added the potatoes. It is critical you DON'T move the potatoes for 3 minutes!


  If you move them around right away you are going to leave a lot of potato in the pan, and they won't have that nice crispy stuff on the outside.. I learned that the hard way!  So leave them alone for 3 full minutes!  To busy your hands you can sit on them, or make them useful and pull that bacon out of the pan and chop it up.  You can also crack the eggs into the non-stick pan you will use to cook them so they will be ready to go - do something! Just don't touch those potatoes!  Did I get my point across? Great!  Now that 3 minutes is almost up, go ahead and salt and pepper them to your liking. I used about 1/2 teaspoon salt for this amount of potatoes.  I normally would used fresh cracked pepper, but I was fresh out (GASP!), so I used ground pepper - it worked!


Now that the 3 minutes is up you get to stir those potatoes!  I know it's been driving you crazy to just let them sit in the pan without stirring them, so go ahead and knock yourself out. Stir those beautiful potatoes and see how wonderfully crispy they are!  HINT - if you go to stir them and they are sticking to the pan - your heat is too low! Turn it up and let them sit another minute or so. They will release when they are ready to be stirred!  How's that for smart food - it tells you when it's ready (sort of).

Now you get to add the chopped bacon, onions and the garlic. Stir them for about a minute or two.  Then turn the heat down to mid-low and let those potatoes cook until they are as soft as you like 'em.  You'll be busy making the eggs, but you'll want to stir the potatoes occasionally during this time.


Now that the potatoes are going nicely, you can start on your scrambled eggs.  For the eggs I start with a cold, dry sauce pan. I use a non-stick pan for scrambled eggs to make clean-up a snap. Eggs really like to stick to my stainless steel pans, and I really DON'T like cleaning them up, so I purchased a chemically safe, non-stick pan just for making scrambled eggs!  Go ahead and crack your eggs in the cold, dry pan. I also add a tablespoon of butter for every 3 eggs I use. I made 6 eggs this night, so I used 2 tablespoons of butter. DO NOT ADD SALT YET!!  Eggs are one of the few things you want to salt AFTER they are cooked


Now that you have your eggs and butter in the pan, go ahead and turn on the heat to mid-high.  Start whisking your eggs - every once in a while check on your potatoes and give them a stir.  


Keep whisking your eggs... and stirring your potatoes


When your eggs start to thicken, you want to take them off the heat for 20-30 seconds and keep whisking while utilizing the heat in the pan.  Then go ahead and put them back on the heat - all the while keep whisking.  You will move them on and off the heat until they are fully cooked. Removing them from the heat every so often will help keep you from overcooking the eggs - no one likes to eat rubbery eggs - yuck!  Once your eggs are sufficiently cooked...


Pop your toast in the toaster, and remove the eggs from the heat. Add in 1 ounce of cream cheese. Stir that around to incorporate and then salt and pepper your eggs to your liking.  I sometimes like to add fresh chopped basil too, but on this night I made a Chimichurri Sauce (see recipe below - you can make up ahead of time)  Go ahead and plate up the eggs and potatoes with the toast and add some chimichurri sauce either on the side or, go ahead and be bold, and put it right on the eggs! Yummmmmm


I opted to eat just eggs and toast with the chimichurri sauce, so here is a pic of my plate


Chimichurri Sauce

1 cup (packed) fresh Italian parsley
1/2 cup olive oil
1/3 cup red wine vinegar
1/4 cup (packed) fresh cilantro
2 garlic cloves, peeled
3/4 teaspoon dried crushed red pepper
1/2 teaspoon ground cumin
1/2 teaspoon salt

Puree all ingredients in a blender or a food processor. Transfer to a bowl, cover and let sit at room temperature until ready to use. You can make this up a couple hours before if you like.


Saturday, 26 May 2012

Chocolate Chip Pistachio Cupcakes


My sweet hubs has developed a sweet tooth! He never used to have cravings for sweets.  When we were a young couple I was working full time and didn't cook or bake all that much.  About once a month I would make brownies, and that was a real treat!  

Come to think of it, we really didn't eat at home all that much back then. I was working the 2nd shift at the police department, and Don was going to fire school during the day.  He used to meet me for dinner - we would often meet at the Pizza Hut for a quick bite on my dinner break.


It wasn't until Madison was born that we started eating at home.  


Madison started helping me in the kitchen at a very young age. She took to it right away - it doesn't seem like all that long ago she was standing on a chair flipping pancakes! So it was no surprise when she started baking and creating original recipes. Madison really knows how to make a yummy cupcake, and don't get me started on her pies!! 


 Being the good dad he is, Don happily tasted all of her creations!  This MUST be how he developed a taste (addiction) for sweets! The past couple days the cupboards have been bare and each night I hear "What do we have sweet to eat?"  I got tired of hearing it, so today I made some cupcakes for him. I'm sure they pale in comparison to Madison's Oreo Cupcakes, but beggars can't be choosers!

I did this despite the fact that I am trying to cut out the carbs to lose some pounds!  That is LOVE!  I think he appreciated the effort though, he snatched up a cupcake as soon as they came out of the oven! 

Chocolate Chip Pistachio Cupcakes

Cupcake
1 box Yellow Cake Mix
3 whole Eggs
1/2 cup Oil
3/4 cup Buttermilk
3/4 cup Sour Cream
1 Vanilla Bean split and scraped (or 1 teaspoon vanilla)
1/2 cup Mini Chocolate Chips
1/2 cup Pistachios, shelled and chopped

Line cupcake pan with cupcake liners (makes 20-24 cupcakes). Preheat oven to 350 degrees. In a mixing bowl combine eggs, oil, buttermilk, sour cream, and seeds from vanilla bean. Mix well. Add cake mix and mix until just combined. Gently mix in mini chocolate chips and chopped pistachios. Fill cupcake liners 3/4 full and bake for 15-17 minutes until the tops bounce back when lightly pressed. Cool completely.

Icing
4 ozs Cream Cheese
1 stick of Butter (1/2 cup)
1 vanilla bean, split and scraped for the seeds (or 1 teaspoon vanilla)
1 cup Confectioner's Sugar

In mixing bowl, beat cream cheese and butter about 2 minutes, until light and airy. Add vanilla. Reduce speed to low and add sugar about 1/3 cup at a time and mix well. Ice cupcakes and decorate with chopped pistachios.


Friday, 18 May 2012

Pistachio Cupcakes with Strawberry Cream Cheese Frosting


This has been quite a week! I am so glad it is Friday! Yesterday, the needle on the stress meter went through the roof when I got numerous automated calls from the college that there was "an incident"!

Madison attends college in Savannah, Ga.  Her school campus is the Historic District in the city of Savannah - the school has over 70 buildings within the city! The incident was a gunman initially on the loose and then barricaded in one of the upscale, landmark restaurants right down the road from Madison's dorm!
Of course, the District being 1 square mile, everything is right down the road 

The school acted quickly and locked down all buildings advising students to stay inside. The police, too, shut down much of downtown to keep people away from the area.  

SWAT surrounded the restaurant; sent a robot inside; then entered the building and apprehended the perp (HA - love cop show talk)

Even though I was in contact with Madison and knew she was safe, I was still shaken by this event.  Thankfully, no one was hurt and all is back to normal. Just a little excitement to get the kids ready for finals!

With the stress level at an all-time high, I had to get some relief!
So, I took some time out and baked....ahhhhhhhhhhh

I made these Pistachio cupcakes that are the prettiest shade of green - Perfect for St. Patty's Day!
They make me smile (green is, after all, my favorite color)

I was going to frost them with a chocolate butter cream...as suggested in the recipe, but I had a couple strawberries on hand and decided they would be more refreshing with a strawberry cream cheese frosting (not to mention how pretty the pink and green look together) Boy was I right! These little pieces of heaven are definitely refreshing!
Hard to eat just one! The fresh strawberry taste comes through and pairs nicely with the slightly nutty flavor of the cupcake - yummmm yummmm yummmm


1 box White Cake Mix
1 box Pistachio Instant Pudding (3.4 oz)
4 Eggs
1 cup Buttermilk
1/4 cup Oil
1/2 teaspoon Almond Extract
3/4 cup Sour Cream

Directions
Pre-heat oven to 350 degrees and line cupcake pan (makes about 24)
Whisk eggs, buttermilk, oil, extract, and sour cream together in a good sized bowl.  Add cake mix and pudding; combine until just incorporated.  Fill cupcake liners about 1/2 full and bake for about 15 minutes.  The tops of the cupcake should spring back when lightly pressed. Remove from oven and let cool.

Frosting
1 cup Butter, softened
8 ozs Cream Cheese
1 lb Powdered Sugar
1 teaspoon Vanilla
1/4 cup chopped Strawberries

In a bowl of an electric mixer using the whisk attachment, cream butter and cream cheese until fluffy - about 3-4 minutes. Occasionally scraping down bowl. Add the powdered sugar a cup at a time until incorporated. Add vanilla and mix until smooth. Add strawberries and beat until they are chunked up really well. If you are piping the frosting onto the cupcakes you will need to get these really chunked (is chunked a word? hmmmm...I guess it is now) up so they don't clog up your tip...learned that the hard way!  Put frosting in freezer for about 20 minutes to stiffen up if needed. Then frost cupcakes as desired. Store these in the fridge.


Wednesday, 2 May 2012

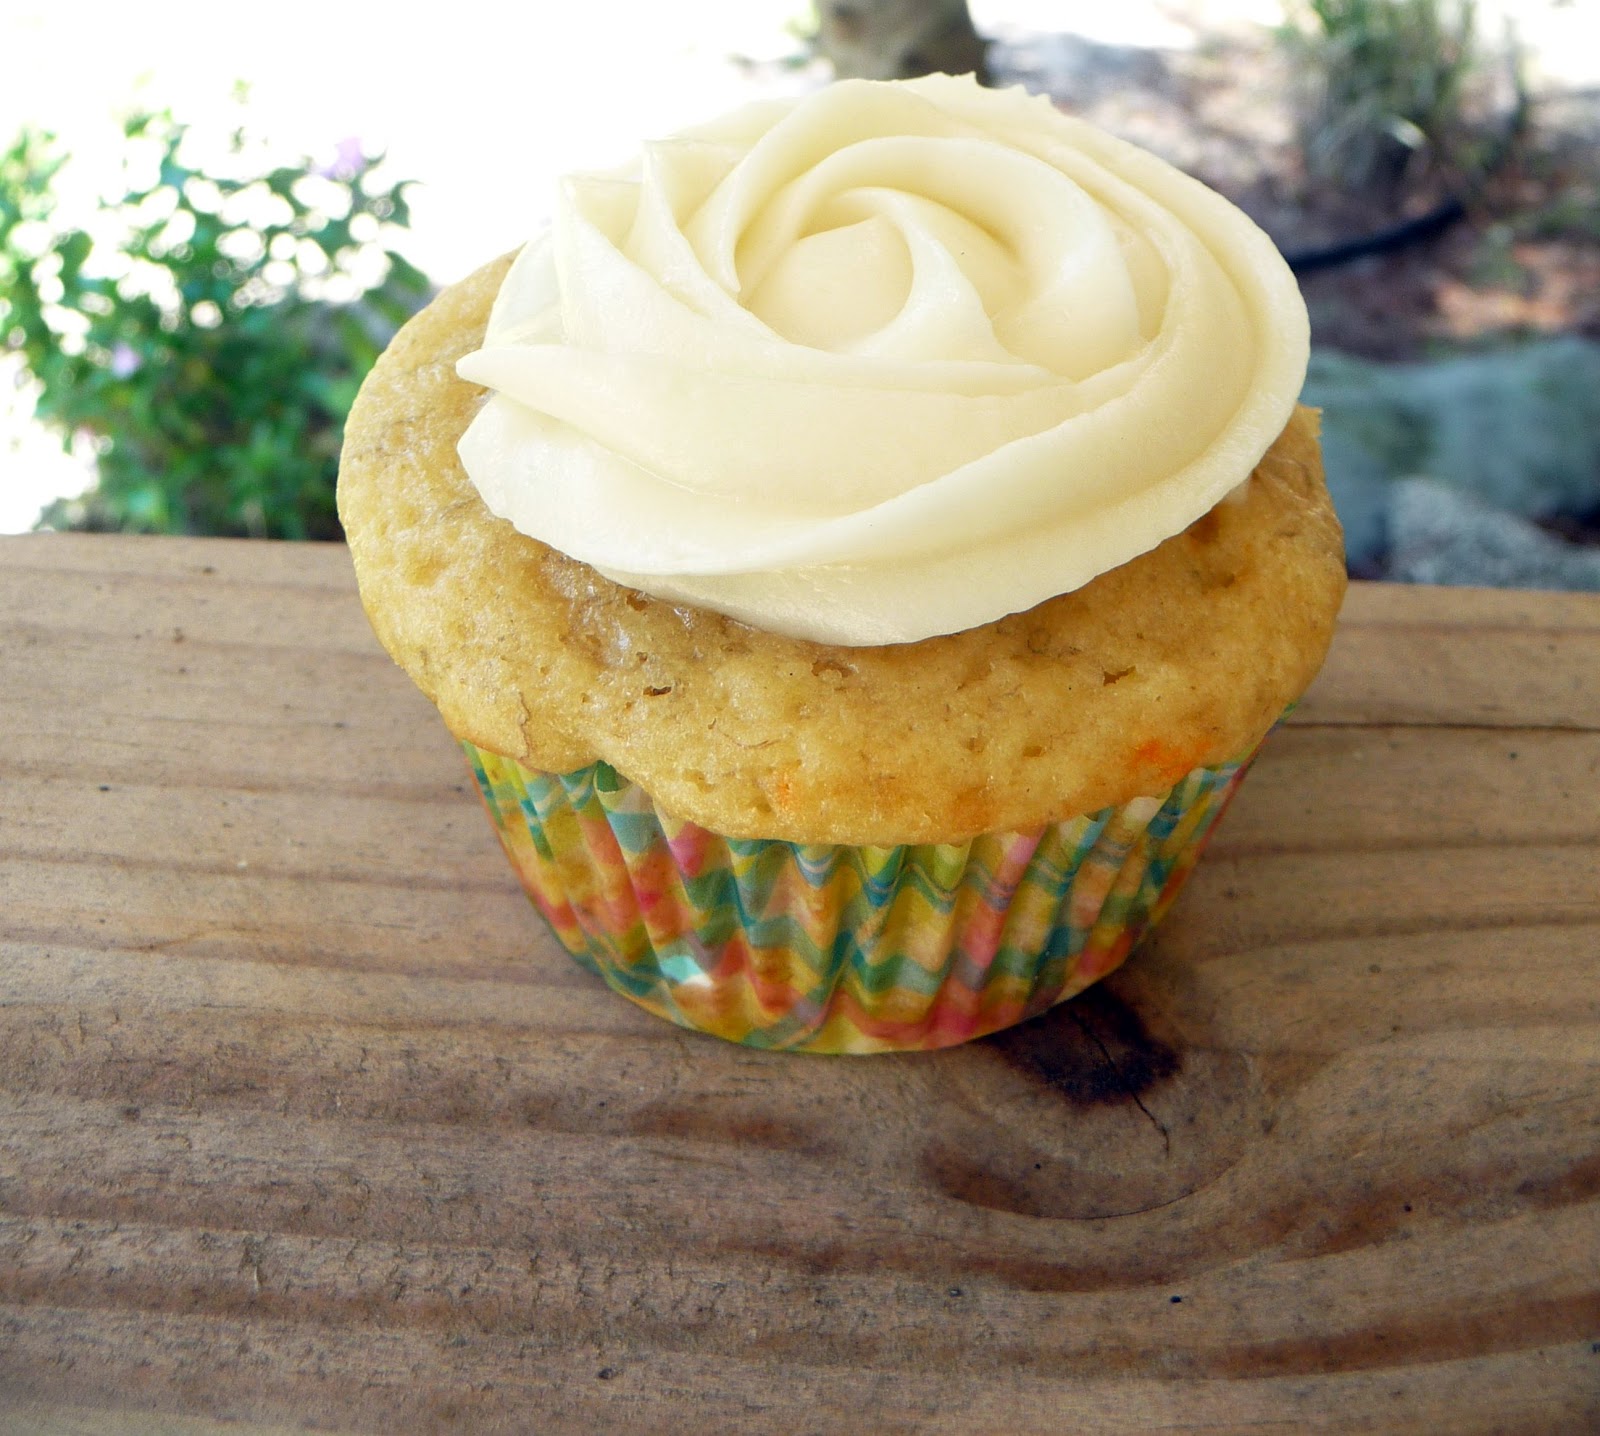
Banana Cupcakes


My sweet mother-in-law always brings me lots of fruit whenever I host a dinner for the family, and she did not disappoint on our Easter gathering.  She showed up with bunches of beautiful fruit! I don't know what I was thinking when I bought a big bunch of bananas the day of our gathering - clearly I wasn't thinking!  I guess the mind goes first...  As you can imagine we had a houseful of bananas this Easter, and I'm not just talking about the fruit!  (just joking Myers' family - heehee)

Now, the way we go through bananas in this house you'd think I'm living with monkeys! (hmmm...that could explain a lot of things)  Anyhoo, having all those bananas wouldn't normally be a problem.  That particular week, however, we had plans to go out of town, and being the conservative that I am I did not want those bananas to go to waste.  I just knew I could find something yummy to create with them...... later, so I popped them in the freezer - peel and all!  

Today I dragged those bananas out and made the most delicious cupcakes!  I don't know if this is a fact, but somehow the bananas seem to have more flavor for baking after they've been in the freezer - maybe it's just my imagination, but it works for me!

Banana Cupcakes
1 box yellow cake mix
1/2 cup flour
3 ripe bananas
1 teaspoon baking soda
1/2 teaspoon lemon juice
3 eggs
1/3 cup oil
3/4 cup buttermilk
3/4 cup sour cream
1 tablespoon vanilla extract

Pre-heat oven to 350 degrees and line muffin pans with cupcake liners (24)
In a large bowl whisk eggs, oil, buttermilk, sour cream, and vanilla. Mash bananas and add to the egg mixture - stir to combine. Add cake mix and flour to the wet ingredients and stir just enough to combine. Fill liners about 2/3 full and bake for 18-20 minutes until the tops bounce back when lightly pressed. Remove from oven and let cool in pan about 10 mins - then remove from pans and cool on baking rack.

Icing
6 oz Cream Cheese, softened (don't use the light or fat free - go all out - it is icing afterall)
1/2 cup butter, softened 
2 teaspoons pure vanilla extract
2-3 cups powdered sugar

Beat butter and cream cheese until well combined - about 3 minutes. Add the vanilla, and then slowly add the sugar 1/2 cup at a time until desired consistency and taste.  If it gets too thick you can thin the icing by adding a little bit of milk until you reach a good consistency.

When the cupcakes are cooled, pipe the icing onto the cupcakes and decorate as you please.  Enjoy!


As you can see in the picture I also made some donut muffins (aka CrackCakes as they are known in my house)!  These little muffins don't last long around here - they really are addictive!


This recipe adapted from Easy Banana Cupcakes with Chocolate Ganache - be sure to browse yourcupofcake.com  for the most wonderful cupcake recipes of all flavors!


Friday, 6 April 2012

Strawberry Cheesecake

Strawberry Cheesecake | by Life Tastes Good
I know they say beauty is in the eye of the beholder, but who wouldn't think this is beautiful?! Right?

Not only is this Strawberry Cheesecake impressively gorgeous, but it is most delicious as well! 

This cheesecake recipe is perfect, in my humble opinion. The texture is smooth and velvety, and the taste is rich (but not too rich), and there is no denying it is pleasing on the eyes!

Of course, this is perfect anytime of year, but this Strawberry Cheesecake typically makes an appearance on our Easter table. It is a truly spectacular ending to a wonderful holiday meal enjoyed with family and friends.

Holiday dinners can be a little stressful, so do yourself a favor and make this up a day or two ahead of time. It will taste even better after spending some time in the fridge and you'll have one less thing to worry about. You're welcome :o)
Click here for more »